
To remove a sliding glass door, first confirm that you are removing the movable panel—not the fixed glass or the frame. Follow the door manufacturer’s instructions to release any stops and retract the bottom rollers if that model requires it. With a helper and suitable glass-handling equipment, lift the panel into the upper channel and guide its bottom out of the sill only if the frame is designed for that movement. Door designs vary, and a large glazed panel can be heavy and awkward. If it will not release smoothly, stop rather than prying or forcing it.
This guide covers the removable operating panel only. It does not explain how to dismantle fixed glazing, cut out a frame, or remove a door attached to the building structure. Those jobs can involve sealed glass, flashing, fasteners and wall finishes; use a qualified door or glazing professional.
Before removing the panel, identify the door type
The correct release sequence depends on the door model and its retaining hardware. Locate the brand and model label, then find the use-and-care or service guide. Identify the operating panel and the fixed panel, and check for head stops, anti-lift blocks, retaining clips or security devices. Some systems allow the panel to lift into the head channel; others use different stops or roller arrangements.
Weather Shield’s sliding patio door guide describes a model-specific method that retracts the panel’s bottom rollers before lifting it into the head frame channel. That example is useful for understanding the mechanism, but it is not a universal procedure for every brand or series. Use the instructions that match your own door.
Prepare the area and get help
- Have at least one capable helper. Large, tall or unusually heavy panels may need professional handling equipment.
- Use glass-handling suction cups rated for the panel and keep hands protected with appropriate gloves. The Loewen LiftSlide guide lists glass cups and mechanical lifting equipment among the tools used for heavy panels.
- Clear a wide route from the opening to a stable, padded place prepared for the panel.
- Protect the floor and keep children, pets and bystanders away from the work area.
- Do not work in strong wind or leave an unsecured opening unattended.
If you cannot support the panel safely throughout the move, do not begin. A helper should be ready before any stop or roller is released.
How to remove the movable sliding door panel
Treat the panel as supported at every stage; do not let its weight drop onto the remaining rollers or track. The following sequence is a general orientation. The manufacturer’s procedure takes precedence wherever it differs.
- Remove the screen if the design allows it. Sliding screens often use separate, lighter rollers and may obstruct access to the operating panel. Follow the screen instructions; do not bend the frame to free it.
- Open the operating panel enough to reach its release points. Keep the panel controlled and make sure the route and landing area are clear.
- Support the panel before adjusting or releasing the rollers. Find the adjustment points shown in the door manual. Some models retract their bottom rollers with an adjustment screw; others use different hardware. Use only the specified screw or release. A nearby fastener may secure the roller assembly rather than adjust it.
- Release stops or retainers only as the manual directs. Keep the panel supported while removing any model-specific head stop, anti-lift block or retaining component. If the hardware does not match the manual, stop and confirm the model-specific instructions.
- Lift the panel into the upper channel and guide the bottom clear. On designs made for this motion, two people hold the panel by its side stiles, lift it into the head channel, and carefully bring the lower edge out of the sill. Keep it upright and under control; do not twist the glass or lever against the frame.
- Carry it to the prepared support. Keep the panel vertical while moving, then secure it on a padded support intended for glazed panels. Do not leave it leaning unsecured against a wall.
Stop if the panel binds, tips, or does not clear the track with controlled movement. Do not force a panel that remains captured by a stop, fastener or fixed-panel arrangement. Recheck the correct manual or call a qualified professional.
Image placement 1 — after this section: Insert the generated image showing two people with suction cups handling a panel. It illustrates why a helper and controlled support matter.
What to inspect once the panel is out
The rollers, track and panel frame work as one system. With the panel safely supported, inspect the bottom roller assemblies and the track for visible damage, debris, corrosion or uneven wear. Note how many roller units are fitted, where they mount, and whether they include height adjustment. Do not assume the left and right assemblies are interchangeable.
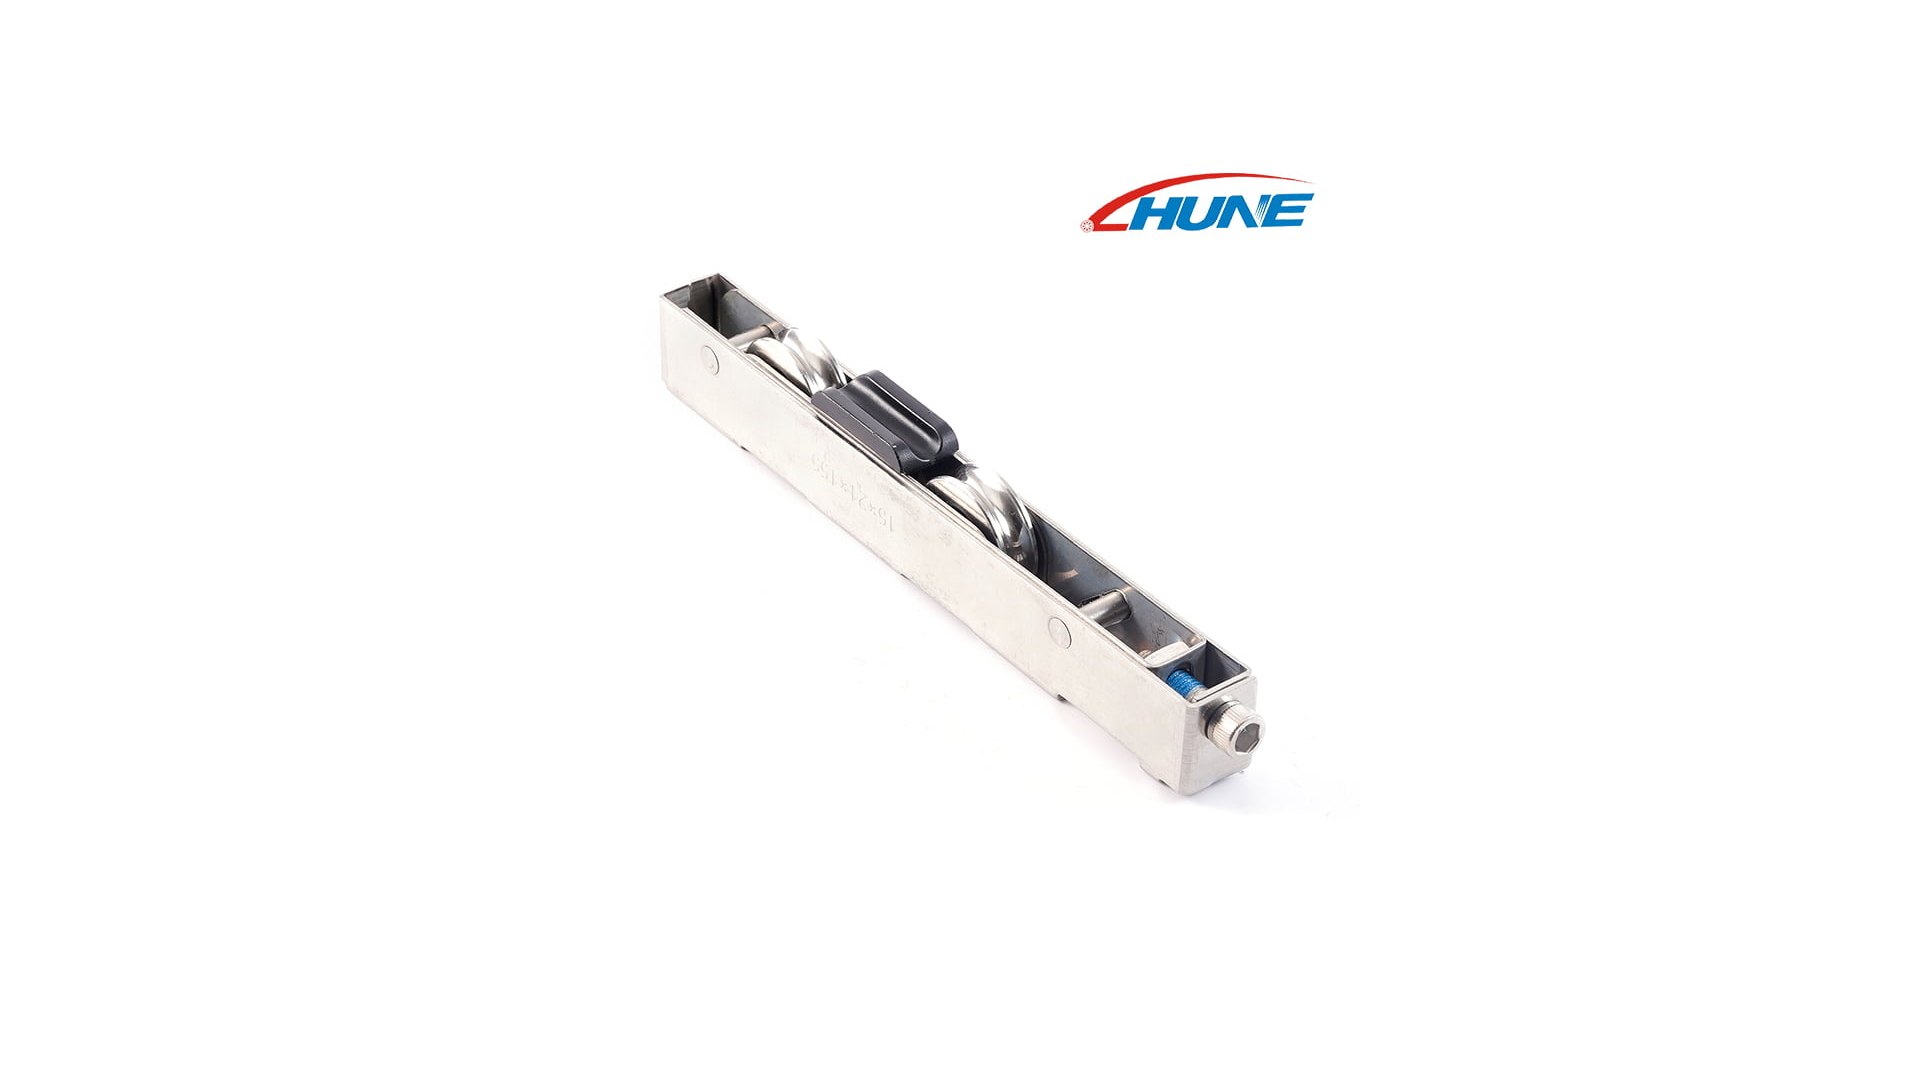
The roller must match the track profile and the door’s mounting pocket. Useful identification details include the wheel material and shape, outside diameter, wheel width, bearing arrangement, axle or stud size, bracket dimensions and adjustment access. A roller that looks similar may still sit at the wrong height, miss the track crown or fail to fit the panel pocket.
Image placement 2 — after this section: Use the HUNE media-library image as an example of a door carriage roller assembly. It is an OEM product example, not a claim that it fits every household door.
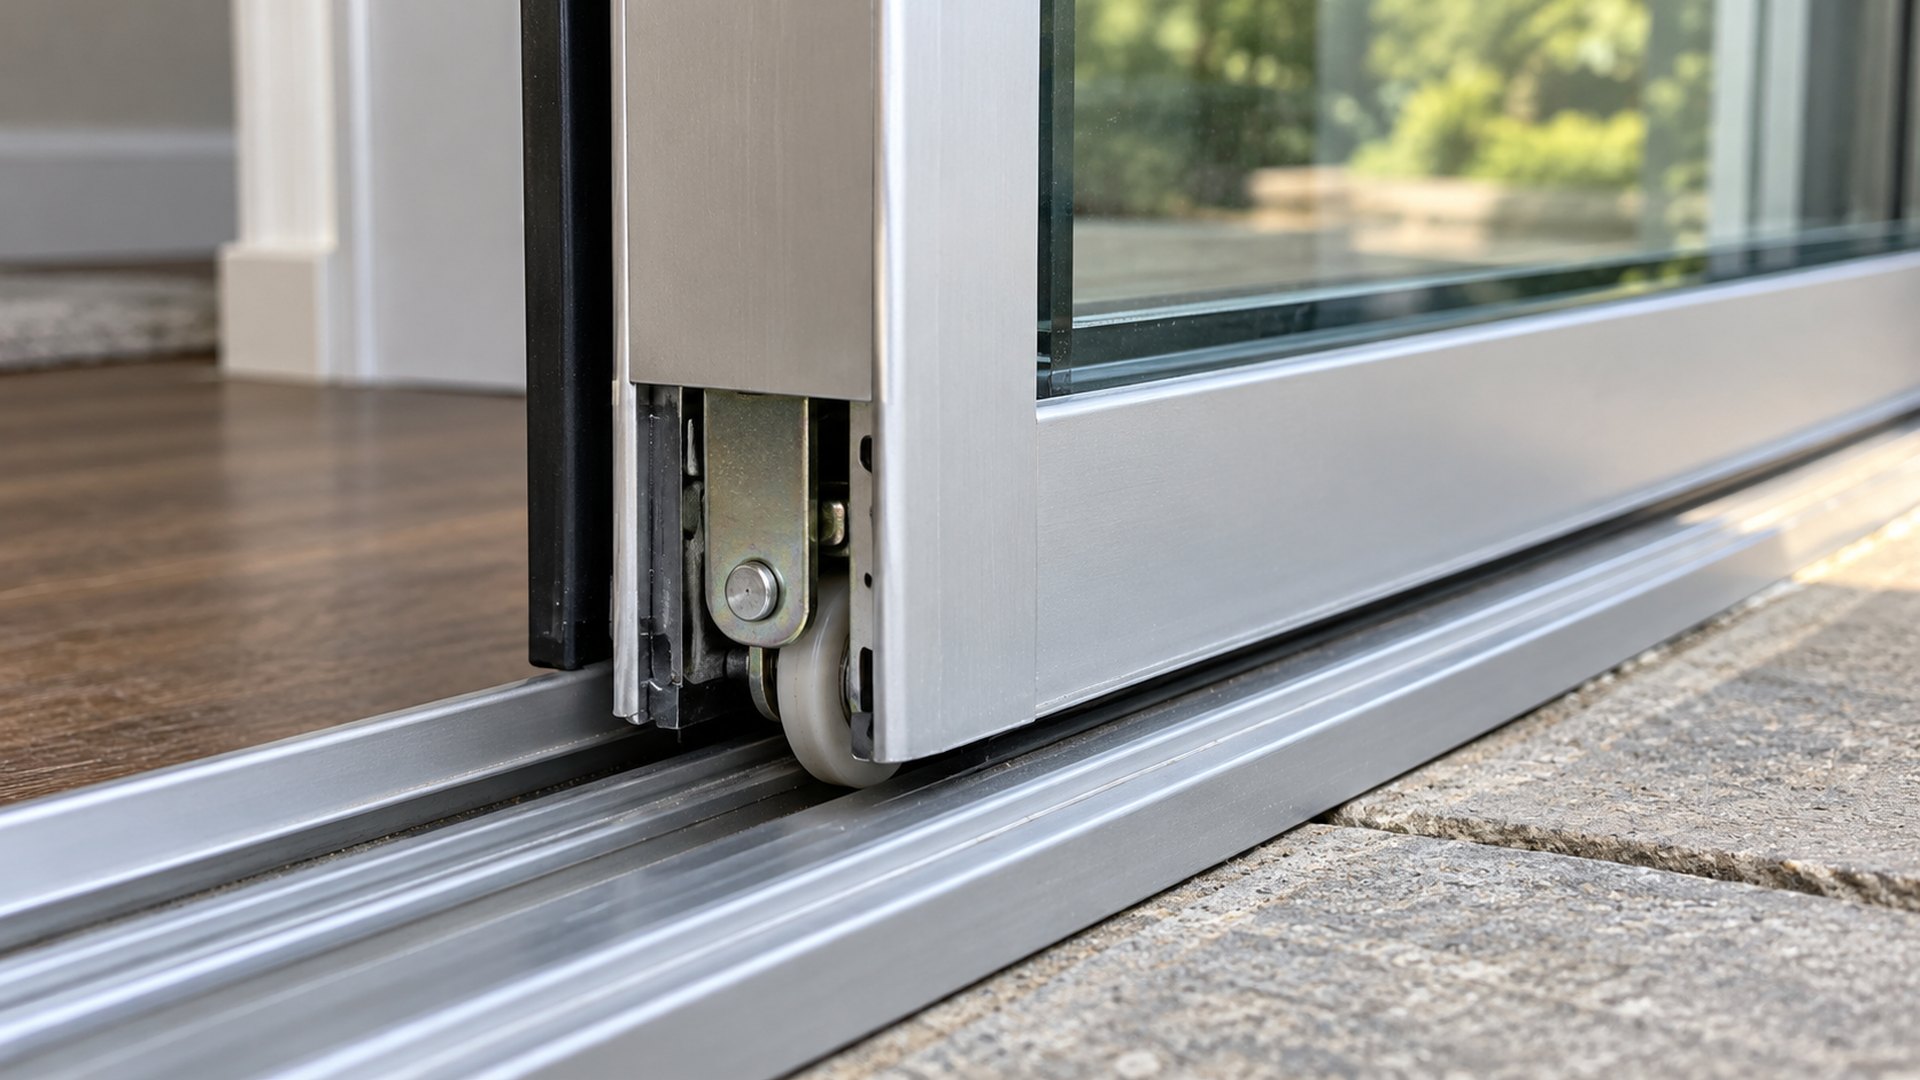
Image placement 3 — after this section: Insert the generated close-up showing the relationship between a bottom wheel and its sill track.

For homeowners, use the door’s identification information and the exact part dimensions when discussing a replacement with the door manufacturer or hardware supplier. For door-system OEMs, the panel pocket, track crown, wheel profile, bearing seat, load sharing and adjustment range should be defined together. HUNE’s sliding door roller assemblies and stainless-steel carriage roller examples show OEM component constructions; neither should be treated as universally interchangeable with an existing residential part.
When should you call a professional?
Do not continue if the panel or frame is not designed for simple operating-panel removal. Get professional help if the fixed panel appears bonded or mechanically captured, the door has concealed security hardware you cannot identify, the glass is cracked, the panel is too large or heavy for controlled two-person handling, or the frame is damaged or distorted.
Stop if removing the panel would require cutting sealant, prying the glazing, removing structural frame fasteners or working at height. Those tasks go beyond ordinary operating-panel removal and may affect the building envelope or glass retention.
Frequently Asked Questions
Can one person remove a sliding glass door panel?
It is not a good assumption. Glazed panels are bulky and can be heavy, and the operator must maintain control while lifting and guiding the lower edge out of the track. Use a capable helper and appropriate glass-handling equipment. If the panel’s size or weight exceeds what you can safely manage, hire a professional with suitable lifting equipment.
Do I need to remove the whole door frame?
Usually not to remove the operating panel. This guide covers the movable panel only. Removing the frame is a separate construction task involving the opening, trim, fasteners and possibly exterior flashing or sealant; it should be handled by a qualified installer or contractor.
Do all sliding glass doors have roller adjustment screws?
No. Some designs use accessible adjustment screws to retract or adjust the rollers, while others use different release hardware. Consult the instructions for the exact door model. Do not turn a screw simply because it is near the lower panel; it could secure the roller assembly rather than adjust it.
Why does the panel still feel captured after the rollers are retracted?
The door may have a head stop, anti-lift block, retaining clip or another feature that must be handled according to its manual. The track may also be damaged or the panel may not be a removable design. Do not force it; confirm the manufacturer’s procedure or contact a professional.
Are replacement sliding door rollers universal?
No. Roller assemblies can differ in wheel profile, diameter, width, bearing arrangement, mounting dimensions and adjustment mechanism. Compare the actual assembly and mating track, then verify fit with the door manufacturer or supplier. HUNE’s article on why sliding patio door rollers fail explains how roller, track and load factors interact.
Practical note for door-system OEMs
Panel removal exposes the roller interface, but fit still has to be verified from the door and track geometry. For a custom project, specify the wheel profile, bearing and axle arrangement, panel-pocket dimensions, track cross-section, adjustment range, load direction, environment and validation conditions. HUNE reviews OEM roller projects through its OEM/ODM process; send the drawing, sample and mating profile through the HUNE contact page.